Cropping options
35mm slides have an image dimension ratio of 3:2. Many compact digital cameras have a squarer ratio than this, or you may have deliberately cropped your image to something of your chosing. By default we don’t crop your image to fit the 35mm frame – any excess left and right (for a squarish image) or top and bottom (for a thin landscape image) is automatically filled in with black. When projected you don’t see the black bars of course – black is the absence of light – and all you see is your image the way you created it.
However, if you don’t want this then when you order your slides you have a choice of ‘Crop to fill frame’. We will then crop the image (which we will do by eye to avoid inappropriate cropping of your image) so that the full slide area is utilised. Note that images are never stretched or distorted to make them fit, just cropped.

Compact camera image

Resulting slide, by default, without cropping

Result using ‘crop to fit’ option.
Cropping in Photoshop
If you would rather ‘crop to fit’ yourself, then accurate cropping in Photoshop is easy and you can greatly speed up working with a lot of files by making use of presets.
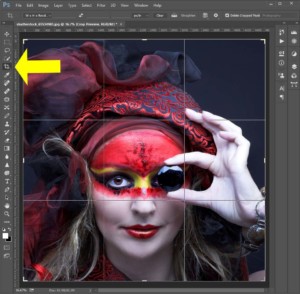
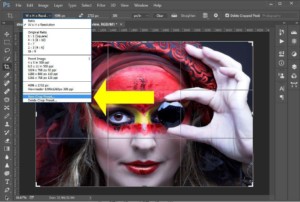
Select the Crop tool
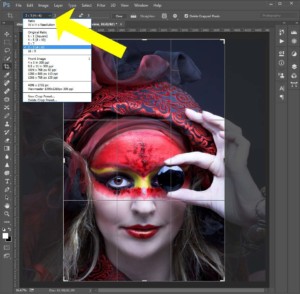
In the drop-down dialogue box choose 2:3. By default the cropping box is portrait.
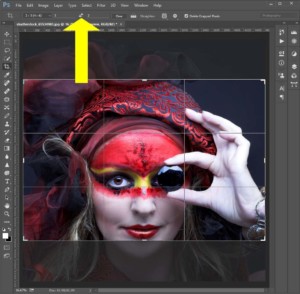
If your image is landscape then click the ‘reverse’ button and the box rotates
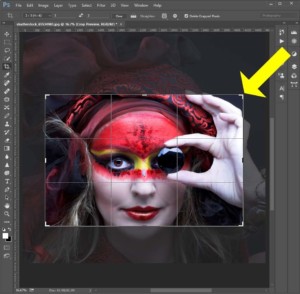
Now click and hold on a corner and you can drag the cropping rectangle around, locked in 2:3 proportions at all times. When you are happy hit the return/enter key and your work is done. ‘Save as’ the file to a new name so that your new cropped version doesn’t overwrite the original.
You can save this crop setting so that you can return to it at any time – just name it something useful. You will see we have a couple of presets set up for 35mm slides and View-Master reels.